My Garden Post

Friday, January 31, 2014

Shake your Tomatoes and Peppers to Increase Pollination

Last week I posted some helpful information on growing cucumbers indoors and two ways you can help nature with the process of pollination, remember?For those who don’t, refer to last week’s post.

Unlike the cucumber, tomatoes and peppers have a perfect flower.This simply means the male and female structures are found in the same blossom. Some pollination and fruit production will take place with little or no help from you, the gardener. However, conditions are different indoors than those on the patio and you can improve pollination and production by practicing a tip I’ll share with you. It’s the topic of today’s post.

Before I move on to tomatoes and peppers, let’s take a look at the growth of the cucumber I pollinated three weeks ago.
Pollinated Cucumber 2 Weeks Ago

Same Cucumber 10 Days Later
The pepper and tomato I'm featuring this week were seeded 83 days ago on November 2nd. The first blossoms appeared at 70 days.  With new blossoms appearing daily, your goal should be to get fruit from as many of those blossoms as possible.  You can maximize production by giving your plants a gentle shake each day. It's that easy.  If your plants were growing outside, the wind and the flutter of bee's wings would shake the pollen loose.  Inside you can shake the plant or individual flowers to free the pollen to enter the stigma and pollinate the flower. This shake is also a good reason to check your plants daily.


California Wonder
New blossoms appear daily
Bushsteak Tomato

Soon to be a cluster of vine ripened tomatoes
How do you know if your daily plant shake is producing the results you want? Keep your eye out for your first little pepper like the one pictured below.


Visit us at www.mygardenpost.com to improve your indoor gardening results. We grow more with less space. Thanks for following, Oliver

Tuesday, January 21, 2014

Doing the Work of Bees While They Sleep the Winter Away

While herbs may be easy to grow inside during the cold months of winters, I enjoy the challenge of growing a few of my favorite vegetables. Challenge might not be the right word because growing tomatoes, peppers, cucumbers and other vegetables that blossom is not difficult. These plants just have needs in addition to those of herbs. Vegetables that blossom require more light, warmer temperatures and pollination in order to bear fruit. Here’s how I provides for those needs.

I have five varieties of herbs growing in three planters on My Garden Post and two planters growing mixed salad greens. I’ve positioned MGP in front of a large south facing window and all are doing fine with a minimum of care and attention. I keep them watered as needed, fertilized every two weeks and I give MGP a 180 degree turn every few days to balance their exposure to the sun. I’m growing more herbs than I can consume so I take every opportunity to surprise friends with some for their cooking needs.

For the fun of it, I have two large MGP planters of tomatoes (BeefSteak), one small planter with a California green pepper and another small planter with three cucumbers (Space Saver) all growing under lights. The room is kept at 65 degrees at night so I’m using heat mats under the planters to keep the soil temperatures above 70 degrees both day and night. Last week I mentioned that gardening is all about experimentation and enjoyment of the results. All that remains is pollination.

Pollination of the cucumbers is the experiment of this week’s post. Outside bees carry the pollen from stamen of the male flower to the female flower. Inside I have to do the work of the bees. It’s great fun and easily accomplished in three steps.

1.    Examine the blossoms to determine which is male and female.

a.    The male flower is noticeably smaller than the female and grows on a short stem. See photo #1.
#1 Male Cucumber blossom growing on a short stem
b.  The female flower is the larger and grows on a longer stem that resembles a tiny cucumber, the ovary. See photo #2.

#2 Female cucumber blossoms growing on a long stem that becomes
a cucumber when pollinated
1.    Using a small artist’s paintbrush, carefully collect the grains of pollen from the stamen of the male flower and deposit them in the center of the female flower. Take care not to damage the female flower. You could repeat this process to make sure you have conception. Then you just leave them alone and watch the tiny cucumbers grow. See photo #3
#3 A pollinated female cucumber blossom well on its way
to producing a mature fruit. (Pollinated 2 weeks ago)

1.    You will likely have at least one male flower for each female. Continue doing the work of the bees with your paint brush until all the female flowers have been pollinated. As more flowers appear, repeat the process.

 Join me next week for tips on pollinating tomatoes and peppers. Both are self-pollinating, but you can assist in the natural process. See below my first pepper blossom that appeared Jan 18. I’ll tell you all about it next week.


 Until then, your questions and comments are always appreciated.
Oliver


Thursday, January 16, 2014

Learning To Use Your My Garden Post

Dear Jane in Florida,

Thanks for your recent call and comments. I’m glad I was able to help you out with your questions and the problem you experienced with the post coupler. After giving it some thought, it seemed a good idea to share some of what we talked about with my followers. Your experiences and questions are not entirely unique and I’m sure some will benefit from the advice I gave you.

I have experienced the same difficulty you did in getting the coupler to side into the lower post section. It happened only once in the many I’ve assembled and one other customer reported the same. The coupler is designed to be a nice tight fit, but it should slide in without fuss. As I told you, I don’t have an explanation why it happens and fortunately it does seem to be a rare event. I’m glad my suggestion to apply dish soap or a lubricant to the coupler worked for you. Most important, the coupler does have to be perfectly lined up with post for it to slide in.

You are obviously having great luck with the tomatoes you’ve germinated. For a first-timer, you’ve done very well. At 12” they are ready to be transplanted. Unfortunately you discarded the seed pack and don’t remember the named variety. You likely have a variety that will be too large for the planters on My Garden Post and they’ll be happier planted in your small garden patch. The good news is you still have plenty of time to germinate a couple varieties that I recommend for MGP, the “Tiny Tim” and “Bushsteak”. This second crop will be ready to harvest when the plants you now have stop producing.

It’s always a good idea to support your local garden center for seeds and gardening supplies, but seed and transplants for the “Tiny Tim” and “Bush Steak” tomatoes are not always available. They are readily available at a couple sources I use. Online you’ll find the “Tiny Tim” at the HudsonValley Seed Library, and the “Bush Steak” at Burpee Seeds. Both are excellent seed companies and deliver within a few days after your order is placed. Their websites also offer a wealth of gardening information.

The “Tiny Tim” was developed to grow in containers and fits perfectly in one of the 8” planters on My Garden Post. It produces a great number of cherry sized fruit on a plant that grows about 12-16” tall and the same width. The seeds will germinate in 5-7 days and produce fruit 45 days after you transplant them into the planter. The “BushSteak” is one of the best staked tomatoes. It’s a stalky plant that produces an exceptional number of good sized fruit with wonderful taste. I’ve grown it in the two large planters for the past three summers and found it to be the perfect tomato for MGP.


Thank you for this lovely picture. While most owners of My Garden Post grow vegetables and herbs, you are obviously getting great enjoyment with these beautiful annual flowers. Gardening is all about experimentation and enjoyment of the results. Please keep me informed of progress with your peppers and tomatoes.

I love your pool,
Oliver

Sunday, January 12, 2014

Greetings from Eleuthera

Greetings from Eleuthera, Oliver

My husband and I have been following your blog the last few weeks and we decided My Garden Post is perfect for our needs, so we ordered one prior to leaving for the Bahamas for the winter. It was an experience getting it here and we ran into a variety of problems. No problems with your product, getting it here and finding soil and plants posed some unexpected challenges. I’m writing to tell you how happy we are with our My Garden Post and to share a few pictures and details of our somewhat humorous story.

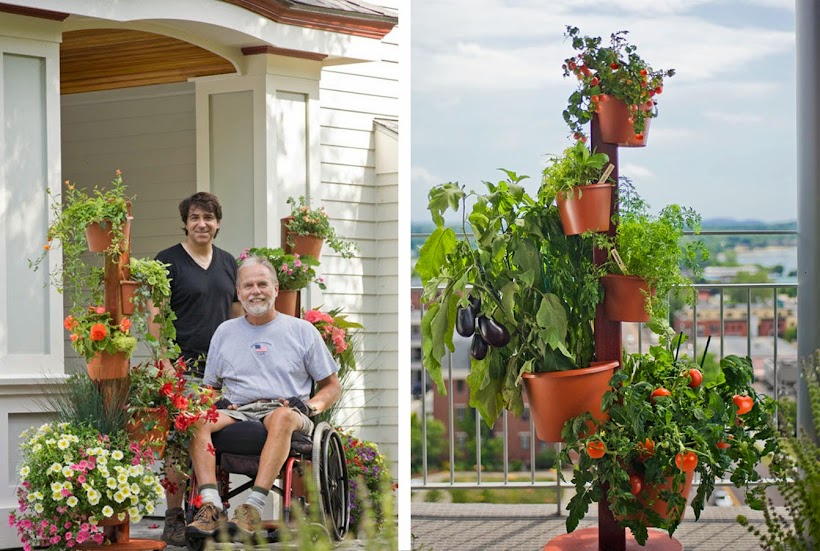
First I’ll explain why MGP is perfect for us. I’m recovering from hip replacement surgery and just not able to get down on my knees in the garden. Vertical gardening is painless and hassle free for me now. Actually growing a vegetable garden on our property isn’t an option. We’ve owned our little cottage in heaven for the past four years. We have a great view of the ocean and all we need to be comfortable and happy except for a vegetable garden. The soil is coral based, stony and has very little organic matter. I’ve worked hard to landscape our lot with native plants, but I’ve had no luck growing basic vegetables. Now I look forward to growing tomatoes, peppers, greens and herbs right on our deck with good soil and automated irrigation. We’re pretty happy with that.


This picture shows our humble start, which is not all my fault. Things move very slowly in the Bahamas. That’s one of the things we love most about being here, but I was in a rush to get gardening soon after we landed. I mentioned we had problems, right. There wasn’t a bag of good potting soil to be found on the island for the first three weeks we were here. I brought seeds from home and I was sooo anxious to germinate them. When the boat arrived, the hardware store called me and I rushed to town before they sold out.

With my bags of soil in hand, I went looking for starter plants. I found some at another small hardware store. The few tomatoes and peppers looked very healthy. I couldn’t find any signs or tags and the friendly young attendant was no help. She said they must have fallen out. I thought what the he--, I’ll give them a try.

I’m happy with My Garden Post and optimistic for a good harvest of my unknown tomatoes and peppers. My mixed greens and assorted herbs germinated quickly and have put on a lot of growth since I took this picture. Temperatures have been perfect so far and the sun never disappoints us. We’ll do things a little different when we return next winter. I should mention our My Garden Post fits perfectly in one of our large suitcases and passed through customs without notice. We plan to take it home with us in the spring.

Love our MGP,

Kathy

Wednesday, January 1, 2014

My Garden Post on the Road

Hi Oliver,

Mike and I first learned of My Garden Post when doing a search for vertical garden systems and thought it would be ideal for our RV travels. When we arrived in Arizona for the winter, we placed an order for a MGP soon after we settled into our park. It arrived a few days later and we’re very happy with our purchase. Your blog has given us some good ideas. Mike thought you would enjoy the attached pictures and details of our first gardening experiences.

Assembly went off without a hitch, just as your instructions promised. Mike systemically followed steps to install the drip irrigation system. It took us about 45 minutes and it works like a charm. A few of our neighbors stopped by to see what we were up to. They were impressed; you should see some orders from them in the near future.

Mike is proud to include this picture of the drip tubing arrangement in the base. It’s very innovative. We love it.


The day after we assembled our My Garden Post, Mike and I headed off to Lowe’s for soil, plants and fertilizer. We weren’t able to find some of the varieties you recommend, so we just bought plants we thought we would enjoy growing. Our plan is to make full use of all the planters and thin the plants later as we have to. 

We chose a couple tomatoes and a red California pepper. The thyme and rosemary looked very healthy so we bought a 4” pot of each. I wanted some color and added pansies, petunias and alyssum. We bought a couple seed packs of mixed greens and plan to germinate them inside and transplant them to the planters in a month or so. As the planters begin to fill out, we’ll send you more pictures and an update on our success.


We no sooner got MGP planted when Mike commented that it would be great to have one or two more. So don’t be surprised if you see another order from us come through.

Plans are to stay here in Arizona until May, then hit the road again. We’re thinking that we might stow our My Garden Post fully assembled in the RV when travel to our next location.

Thank you so much; we love our My Garden Post.

Linda and Mike
Mesa, Arizona